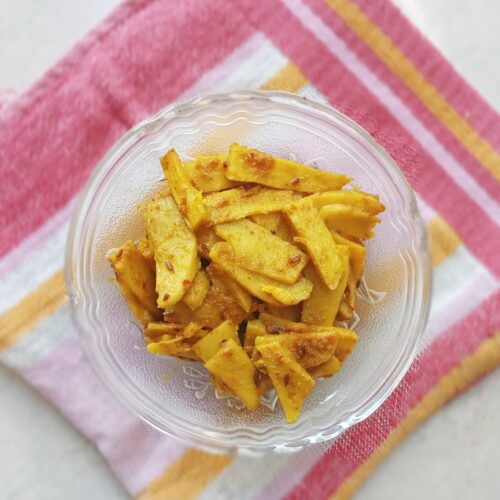
Arbi Sabzi Recipe – Crispy, Spicy & Flavorful
Want a quick yet delicious side dish that complements your main meals too? So, here is this arbi sabzi recipe that fits perfectly into your everyday meals and comes together in a few minutes. It is made with arbi (taro root), oil, and simple spices, all together, and cooked until tender and crispy. This arbi fry recipe is a no-onion-garlic version that is also naturally vegan and gluten-free.
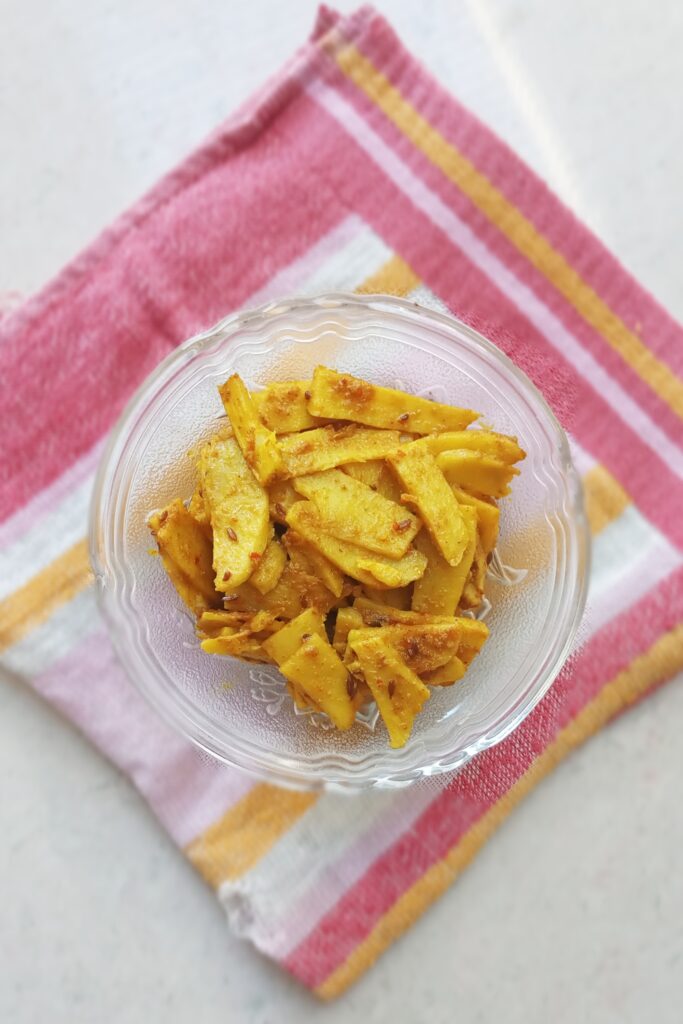
Table Of Contents
About the arbi sabzi recipe
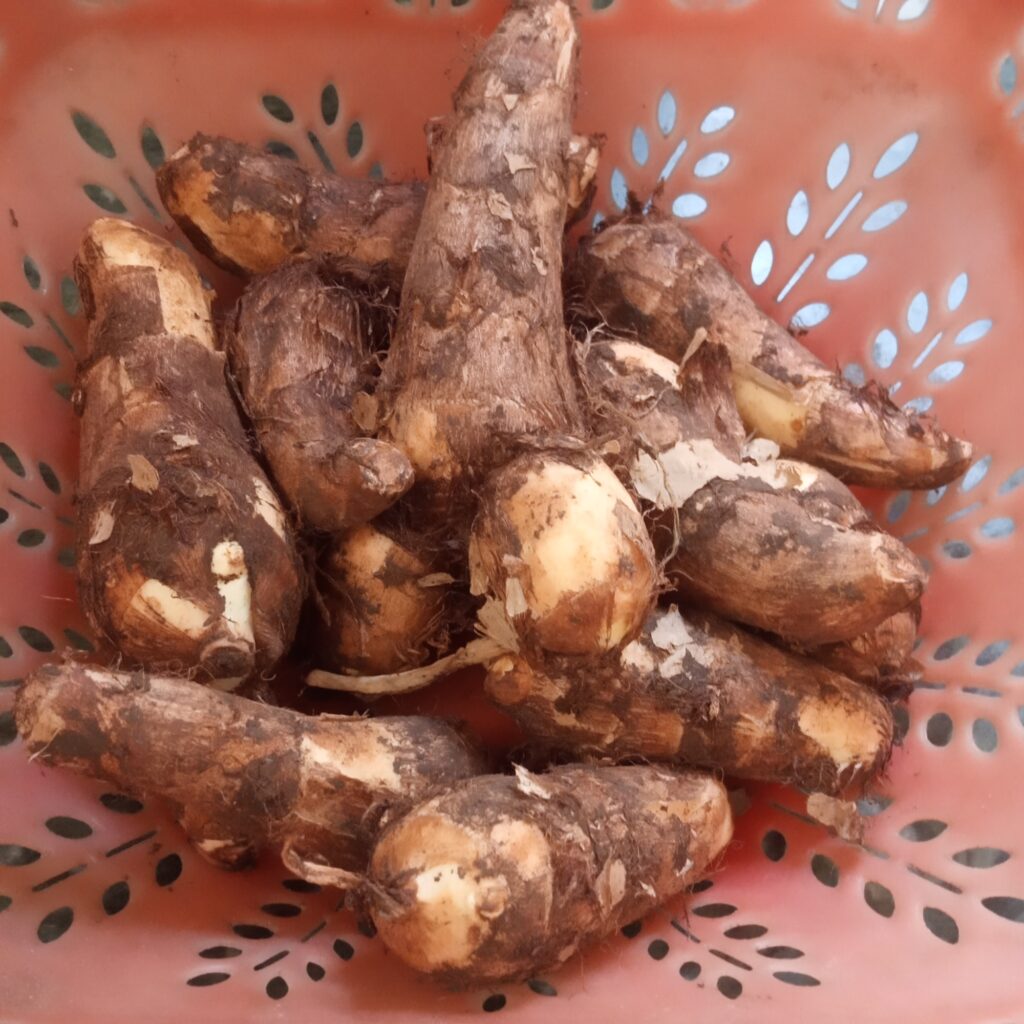
Arbi, commonly known as taro root or ghuiya in Hindi, is widely used in Indian cuisine for making fries, curries, and chaats. It is brown in colour, with a potato-like root fuzzy texture on the outside and creamy, starchy flesh on the inside.
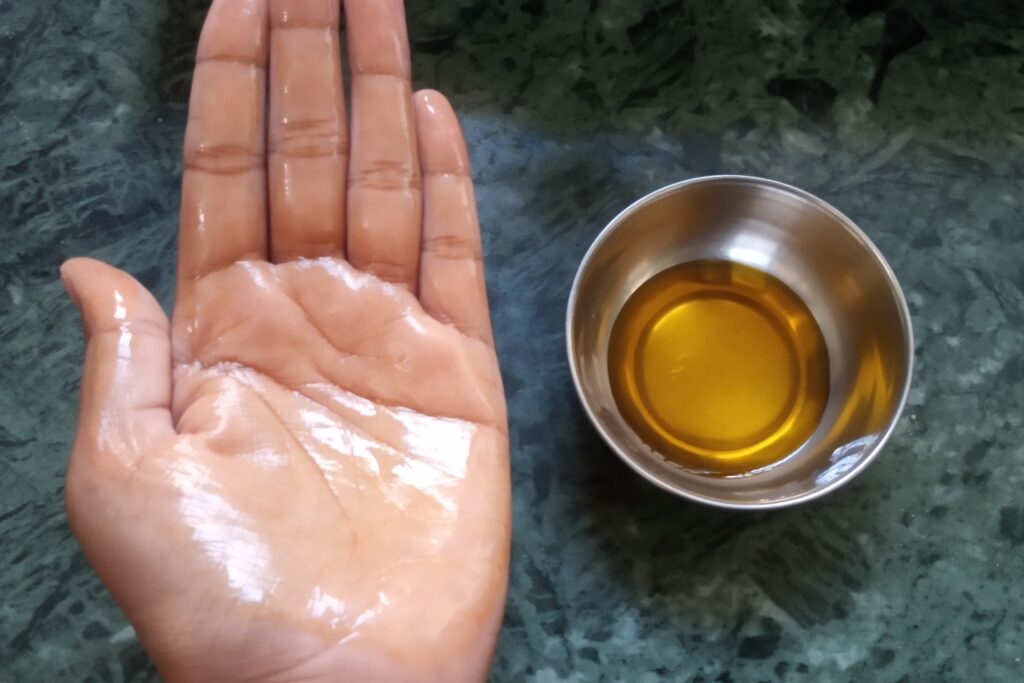
Today, I’m sharing the dry arbi sabzi (arbi ki sookhi sabzi) with you, which starts with the greasing procedure. Before peeling, greasing the palms with oil (mustard or any vegetable oil) is necessary because the starchy texture of taro root creates itching in the hands. So, make sure to grease them properly as a protective barrier.
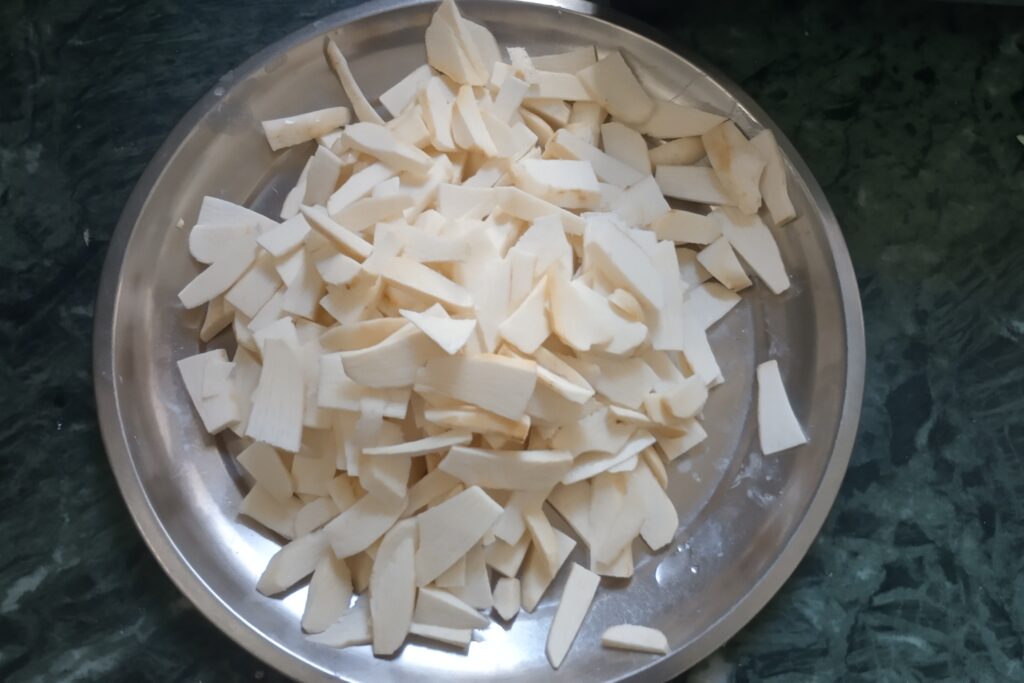
After peeling, thinly slice them into long pieces. Then start tempering cumin or carrom seeds in mustard oil and add sliced arbi with spices. Cook them on a low flame until tender and crispy; this is called arbi fry recipe. My recipe is made without onion or garlic and includes all simple ingredients.
This is my mom’s favourite recipe; she always makes this crispy arbi fry rather than curry. So, I personally like this the most; it tastes authentic when paired with paratha, poori, and simple roti. She usually makes it for breakfast, in front of guests, and for a lunch box. Another one she used to make is dry aloo sabzi, which also perfectly fits into everyday meals.
More vegetable dishes you may also like:
Ingredients
- Arbi (Taro Root): I used 500 g of arbi and sliced it into thin pieces. Choose fresh, firm taro root without soft spots for better texture.
- Oil: Mustard oil is best to use for flavour, or you can use any vegetable oil.
- Seeds: Carrom seeds (ajwain) and cumin seeds (jeera) are used for tempering.
- Spices: Coriander powder, turmeric powder, and red chilli powder are used as spices. You can add some asafoetida too.
How to make arbi sabzi recipe
1. First of all, grease your palms with oil shown in the picture below.
2. Now peel the taro root with a knife, then wash it in clean water and thinly slice it into long pieces.
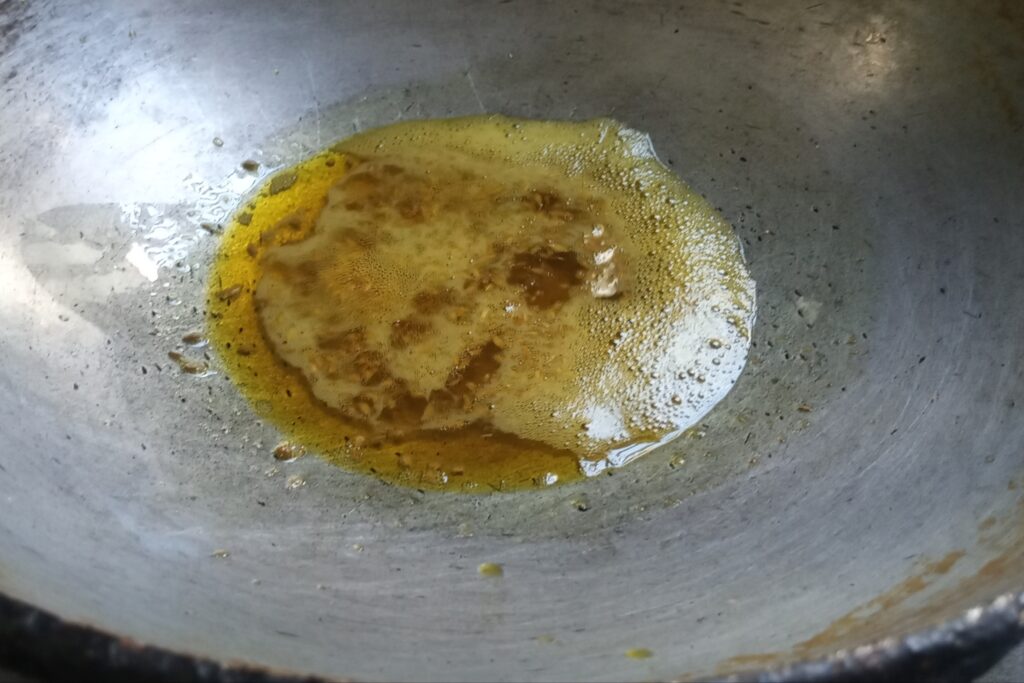
3. Heat 3 tablespoons of oil in a heavy-bottomed kadai on medium flame. Add 1/2 tsp carrom seeds and 1/2 tsp cumin seeds to sizzle.
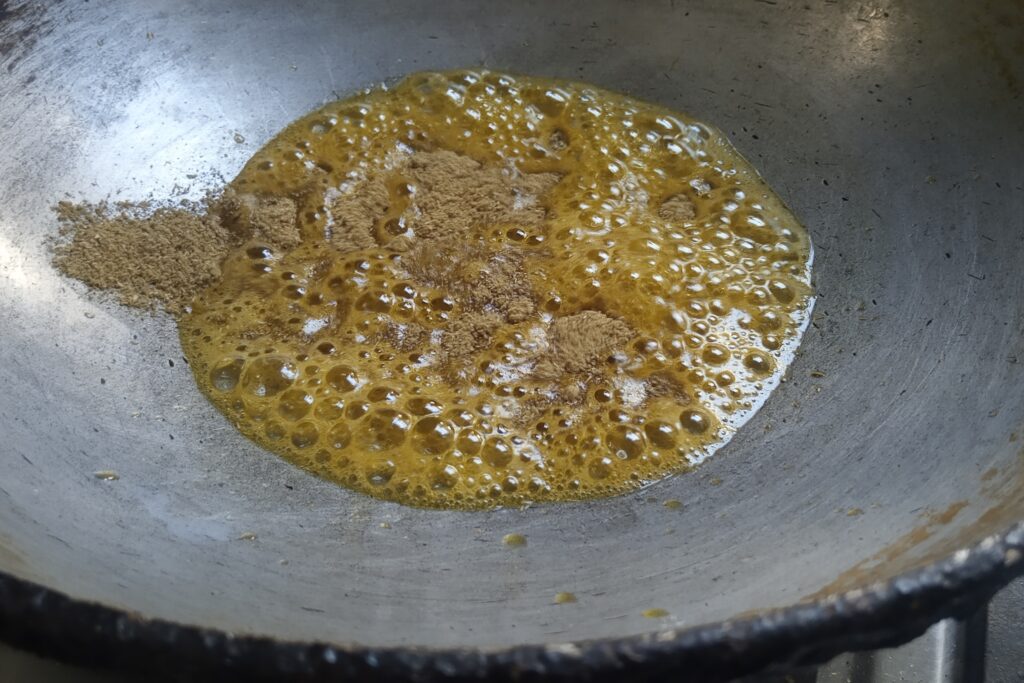
4. Add 2 tsp coriander powder and sauté for a minute.
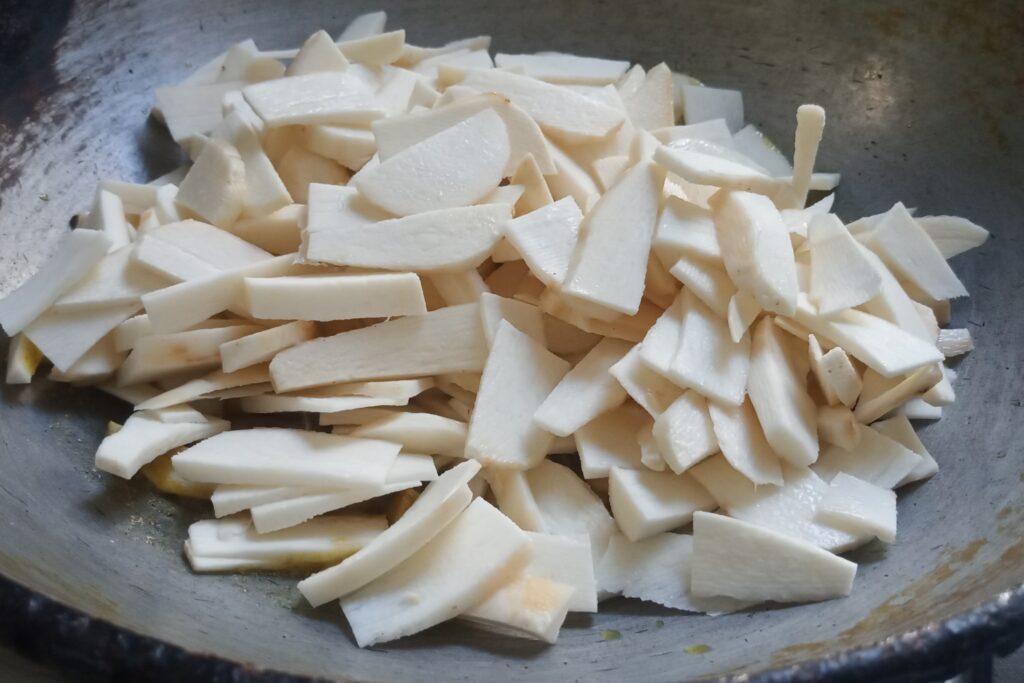
5. After that, add sliced arbi into it.
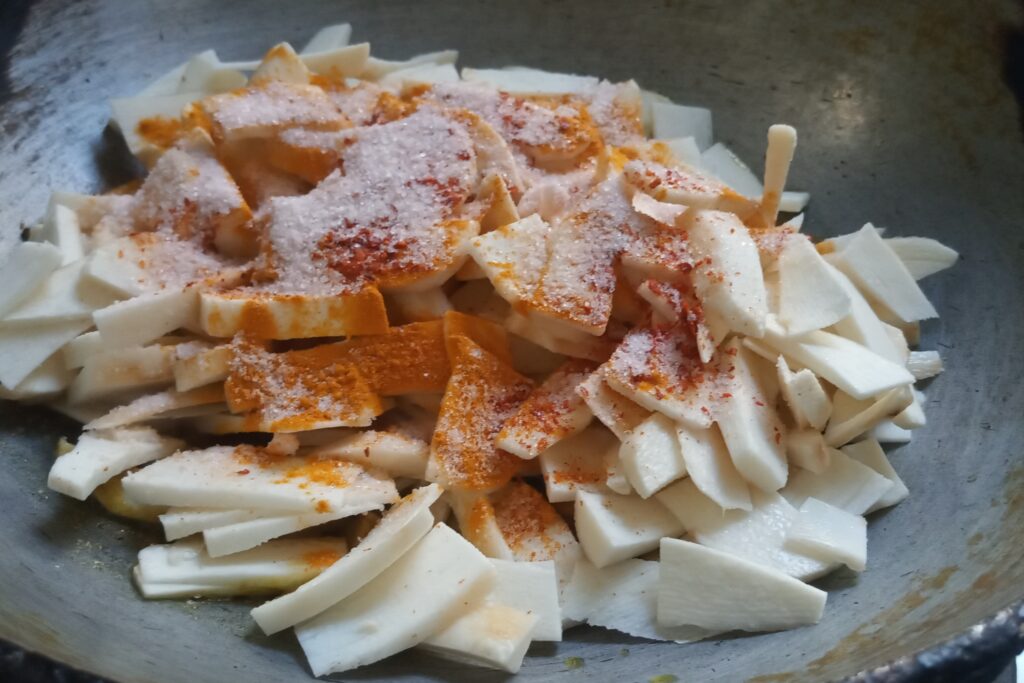
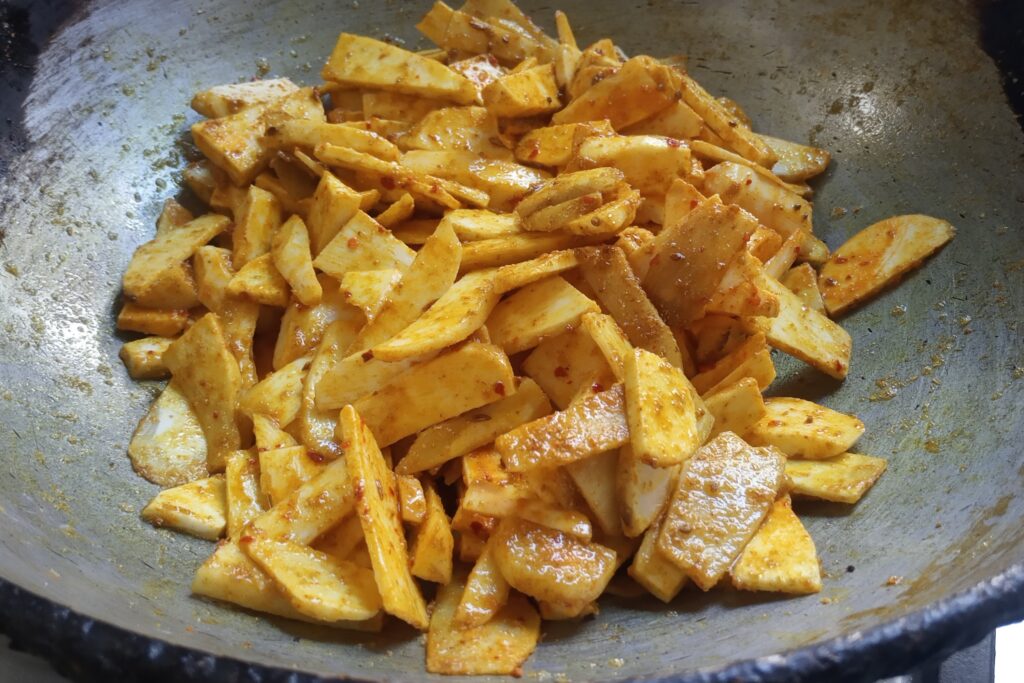
6. Season with 1/2 tsp turmeric powder, 1/4 tsp red chilli powder, and 1 tsp salt.
7. Mix all the ingredients well, cover the kadai with a steamer and cook on a low flame until crispy and tender.
8. Stir in between with a spoon so that it does not stick to the bottom of a kadai.
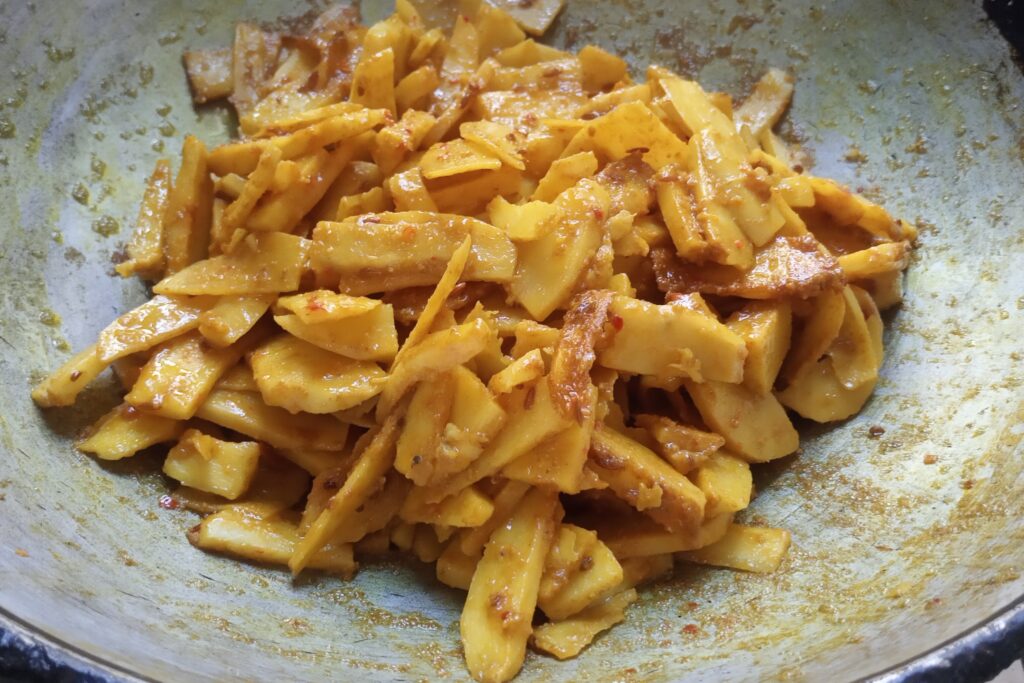
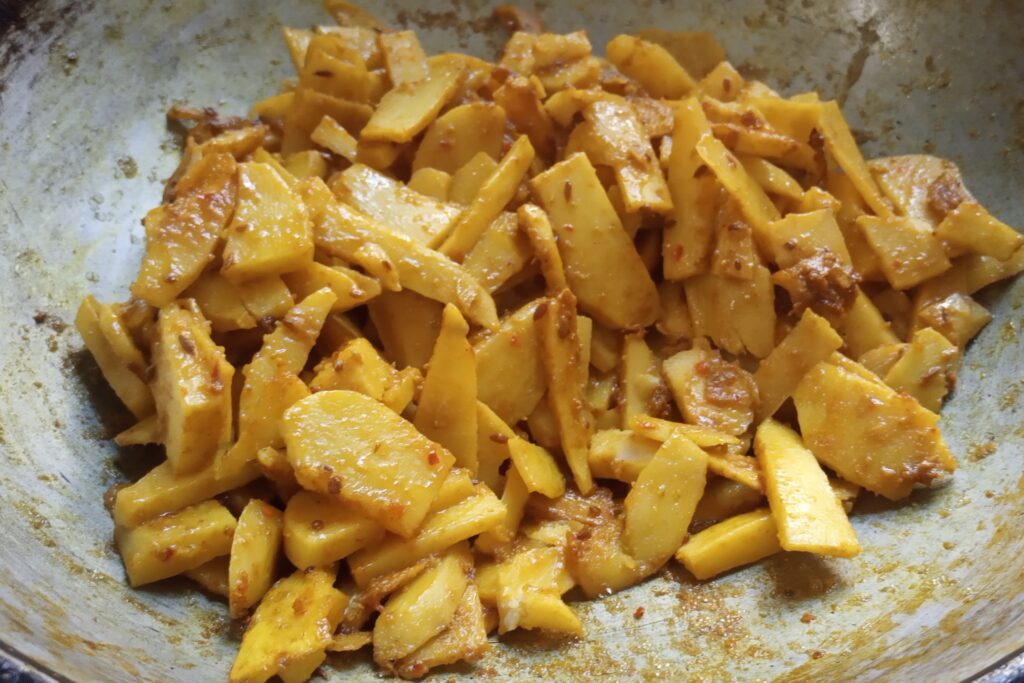
9. When it becomes tender and crispy, turn off the flame. It takes 18-20 minutes on low heat to cook properly.
Serving
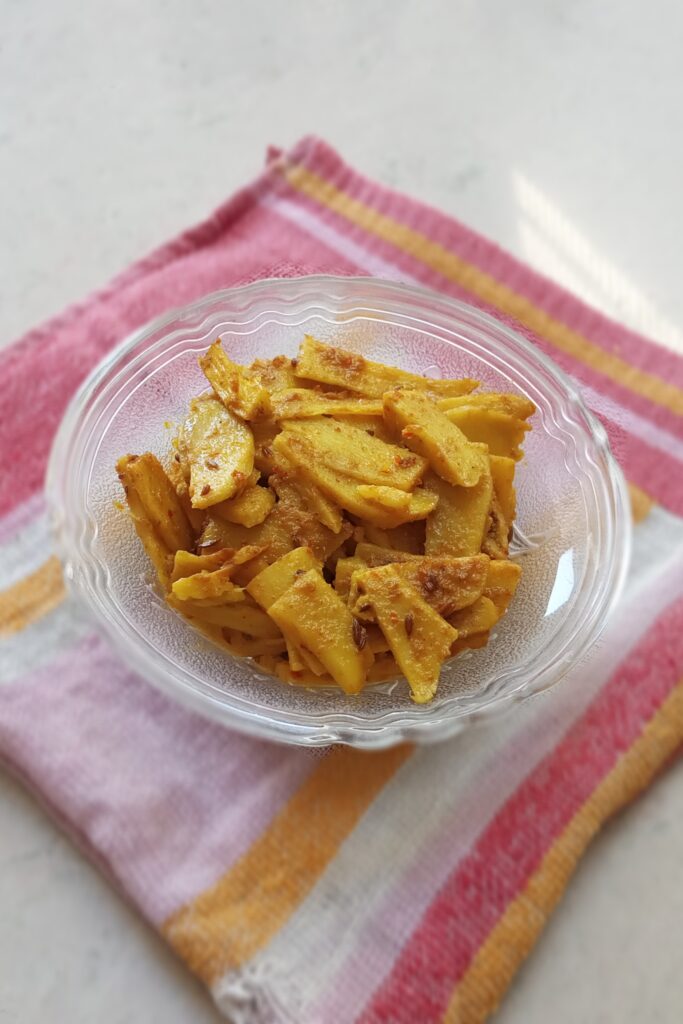
Serve this dry arbi sabzi with plain paratha, poori, and simple roti alongside cucumber and boondi raita for a complete meal. You can enjoy it alongside Indian curries and dals with a glass of flavorful masala chaas.
Pro Tips
- Wash the arbi thoroughly to remove the dirt properly before cooking.
- Always grease the palms with oil before peeling taro root to avoid itching.
- Slice the arbi thinly into long pieces for even cooking.
- Use a good amount of mustard oil for better texture.
- Cook the arbi on a low flame so the spices coat the arbi evenly.
- Stir gently while cooking to prevent the arbi from breaking apart.
- Add some asafoetida to enhance the flavour.
- Let the sabzi rest for a few minutes before serving so the flavour melds properly.
Arbi Sabzi Recipe – Crispy, Spicy & Flavorful
Ingredients
- 500g arbi (taro root)
- 3 tbsp mustard oil
- ½ tsp cumin seeds (jeera)
- ½ tsp carrom seeds (ajwain)
- 2 tsp coriander powder
- ½ tsp turmeric powder
- ¼ tsp red chilli powder
- 1 tsp salt
Instructions
- Grease your palms with oil, then peel the arbi with a knife.
- After peeling, wash them in clean water so the soil comes off easily.
- Now thinly slice them in a bowl or on a plate.
- Heat oil with cumin and carrom seeds in a kadai on medium heat. Let them sizzle.
- Then add coriander powder and saute for a minute.
- Now add the coriander powder and saute it for a minute.
- After that, add sliced arbi to it.
- Season with turmeric powder, red chilli powder, and salt.
- Mix all the ingredients well, cover the kadai with a steamer, and cook at a low flame until crispy and tender.
- Stir in between so that they do not stick to the bottom.
- When they are soft and tender, turn off the flame.
- Serve with hot phulka and plain paratha.
Notes
- Wash the arbi thoroughly to remove the dirt properly before cooking.
- Always grease the palms with oil before peeling taro root to avoid itching.
- Slice the arbi thinly into long pieces for even cooking.
- Use a good amount of mustard oil for better texture.
- Cook the arbi on a low flame so the spices coat the arbi evenly.
- Stir gently while cooking to prevent the arbi from breaking apart.
- Add some asafoetida to enhance the flavour.
- Let the sabzi rest for a few minutes before serving so the flavour melds properly.
Yummy 😋